
再谈在 GitHub Issues 写作,顺带算是样式开源
在快三年前,我也在这里分享过 尝试在 GitHub Issues 上写文章并自动同步至博客。当时限于自己的技术栈实在过浅,只会在 GitHub Actions 上用 Node.js 脚本把 Issues 数据同步到 source 文件夹下,然后再手动执行 hexo g。
从现在的眼光来看,Hexo 与其称之为静态站点生成器(SSG, Static Site Generator),我更愿视其为内容管理系统(CMS, Content Management System)——它将特定规律路径下的 Markdown 文件组织成包含 HTML 内容、分类、标签以及其他 front-matter 信息的数据库,生成静态页面只是其功能之一,我们还可以通过一系列 API 获取格式化的博客数据。
在重构自己博客以及写两三个小玩具的过程中逐渐了解 Next.js 等 现代 前端框架,无刷新导航、动态 HTML 渲染让静态页面没那么死板,而且其数据来源完全不限,自然包括从 GitHub RESTful API 获取的 Issues 数据。而且借助 Vercel 的 Serverless Functions,我们可以在不泄露 Token 的前提下在边缘节点中直接调用 GitHub API 实时获取最新数据,无需后端服务器且无需像原来手动部署更新。
这样一来,在 GitHub Issues 上写博客无论对于作者还是读者都达到一个体验的甜点:作者可以在熟悉的环境中写作,GitHub Issues 本身就是一个非常理想的在线 Markdown 编辑器,背靠 GitHub 使得数据可靠性也有了保障;读者也需要在正常博客网页中浏览文章,独立网页也意味着不会牺牲任何内容控制以及 SEO 优化。
经过几天的工作,ginb 初步完成并替代 BloginHub。
Next.js 项目基本结构
Next.js src 目录结构大致如:
.
├── src/
│   ├── app/
│   │   ├── /
│   │   ├── pages/
│   │   │   └── [id]
│   │   ├── post/
│   │   │   └── [slug]
│   │   ├── archives
│   │   ├── tags
│   │   └── tag/
│   │       └── [tag]
│   ├── components
│   └── utils
├── _config.js
└── next.config.js- 文章的
slug就是 Issue 的number - 一些会被复用的组件放在
components目录下 - 获取数据等核心脚手架放在
utils目录下 - 一些网站信息放在
_config.js
而 app 所有目录下的 layout.jsx 都统一控制该目录以及所有子目录的布局,倘若希望整个网站运行再边缘节点上,就只需要在 app 目录下的 layout.jsx 添加:
export runtime = "edge";获取 Issues 数据
ginb 使用 Next.js App Router 与 React Server Components 构建,使用 Tailwind CSS 编写样式 (四年前的这会纯手搓 CSS 的我已经回不来了),主要借助 Vercel Serverless Functions 在更靠近用户的边缘节点通过 GitHub RESTful API 获取 Issues 数据。
即便在 Edge Runtime 中支持通过 fetch 向 GitHub API 发起请求,对于以下语言有官方 SDK 可以使用:
- JavaScript / TypeScript
- C# / .NET
- Ruby
通过 npm 安装 octokit:
pnpm i octokit

# npm i octokit
# yarn add octokit
然后就可通过 octokit.rest.issues 获取 Issues 数据,并通过合适的传入参数列出特定用户特定仓库下由特定用户提起的所有 Issues,由于 API 限制我们需要处理分页,octokit.paginate 可以帮助我们处理这个问题:
import { Octokit } from "octokit";

const octokit = new Octokit({
  auth: process.env.GITHUB_TOKEN,
});
const issues = await octokit.paginate(octokit.rest.issues.listForRepo, {
  owner: username,
  repo: repository,
  creator: username,
  per_page: 100,
});
当然 API 中并非所有数据都是我们需要的,在获取的时候就可以自己格式化下:
function formatIssues(issues) {
  return issues.map((issue) => ({
    title: issue.title,
    slug: issue.number,
    path: `post/${issue.number}`,
    api: issue.url,
    html_url: issue.html_url,
    created_at: issue.created_at,
    updated_at: issue.updated_at,
    tags: issue.labels.map((label) => label.name),
    summary: issue.body.substring(0, 150),
    contentRaw: issue.body,
    comments: issue.comments,
  }));
}
从 Markdown 到 React Node
GitHub API 返回的 Issues 数据中的 body 是 Markdown 格式的字符串内容,而在 React 中我们需要将其转换为 React Node。有许多库可以帮助我们完成这个工作:
MDX 相当于 Markdown 的 React 扩展,可以直接在 Markdown 中使用 JSX 语法。@next/mdx 主要用于处理 App Router 下的 MDX 文件模块,而 next-mdx-remote 虽然可以渲染任意来源的 MDX 内容,但其在 RCS 段落单独强调对于 App Router 和 RCS 的支持仍是试验性的,这也让我着眼于其他第三方工具。
markdown-to-jsx 打包后 bundle 体积更小,但是插件的支持还是 react-markdown 更好,包括 remark-gfm 插件可以支持 GitHub Flavored Markdown、remark-math/rehype-katex 插件可以支持数学公式等。
同时,对于 react-markdown 组建透过 components 属性我们可以自定义渲染 Markdown 组件,比如自定义 a 标签渲染为 Next.js 的 Link 组件 实现站内导航、在 table 外围包裹一个 overflow-x-auto 的容器防止表格过宽等。
<Markdown
  remarkPlugins={[remarkGfm, remarkMath]}
  rehypePlugins={[rehypeHighlight, rehypeRaw, rehypeKatex]}
  components={{
    a: (props) => {
      const { children, href, ...rest } = props;
      if (href.startsWith("/") || url.includes(href.split("//")[1].split("/")[0])) {
        return (
          <Link href={href}>
            <a {...rest}>{children}</a>
          </Link>
        );
      }
      return (
        <a href={href} {...rest}>
          {children}
        </a>
      );
    },
    table: (props) => {
      const { children, className, ...rest } = props;
      return (
        <div className="overflow-x-auto">
          <table className={className} {...rest}>
            {children}
          </table>
        </div>
      );
    },
  }}
>
  {contentRaw}
</Markdown>
在从 markdown-to-jsx 切换到 react-markdown 并添加一定插件之后,打包后的 Serverless Functions 体积从约 290KB 涨到进 480KB。虽然对于 Vercel 的边缘节点来说没有什么明显的影响,但倘若确实只需要最基本的 Markdown 渲染功能,还是 markdown-to-jsx 更适合。
由于 Tailwind CSS 属于 utility-first CSS 框架,在应用到 Markdown 处理后的每一个节点上都需要添加一些类名,这显然并不优雅。Tailwind 组显然已经考虑到这点,通过 typography 插件就只需要在展示 Markdown 内容的容器上添加 prose 类名即可:
<article class="prose">{markdown}</article>由于 typography 插件默认样式与 GitHub 样式有些许差异,同样可在顶部对于一些样式进行自定义:
<div className="prose mt-4 max-w-none dark:prose-invert prose-a:text-blue-600 prose-a:no-underline hover:prose-a:underline prose-blockquote:font-normal prose-blockquote:not-italic prose-blockquote:text-black/60 prose-code:rounded-md prose-code:bg-gray-300/30 prose-code:px-1 prose-code:py-0.5 prose-code:font-normal prose-code:before:content-none prose-code:after:content-none prose-pre:-mx-4 prose-pre:overflow-x-auto prose-pre:rounded-none prose-pre:bg-transparent prose-pre:p-0 prose-table:overflow-x-auto dark:prose-blockquote:text-white/60">
  // ...
</div>
如果你使用 UnoCSS 替代 Tailwind CSS,虽在其他地方几乎无需额外修改即可无缝迁移,但是在 typography 插件上有些许差别。Tailwind CSS 的 typography 插件 可以通过 Element modifiers 为指定元素样式修改,只需在 prose 类名后追加:
prose-[element]:{modifier}例如下面这个例子就是为 a 标签覆盖成蓝色文字、去除下划线以及鼠标悬停时添加下划线的样式:
prose-a:text-blue-600 prose-a:no-underline hover:prose-a:underline而 UnoCSS 的 typography 插件 则需要在 UnoCSS 配置文件通过 presetTypography 引入 typography 预设的时候配置 cssExtend 来覆盖默认样式:
// unocss.config.js
import { defineConfig } from "unocss";
import { presetUno } from "@unocss/preset-uno";
import { presetTypography } from "@unocss/preset-typography";

export default defineConfig({
  // ...
  presets: [
    presetUno(),
    presetTypography({
      cssExtend: {
        // Applying styles to blockquotes within `.prose`
        blockquote: {
          "font-weight": "normal", // corrected from fontWeight to 'font-weight'
          "font-style": "normal", // corrected from fontStyle to 'font-style'
        },
        "blockquote::before, blockquote::after": {
          content: "none", // equivalent to prose-p:before:content-none & prose-p:after:content-none
        },
        // Applying styles to links within `.prose`
        a: {
          "text-decoration": "none", // corrected from textDecoration to 'text-decoration'
          "border-bottom-width": "1px", // corrected from borderBottomWidth to 'border-bottom-width'
          "border-color": "#a1a1aa", // assuming zinc-400 equivalent, corrected from borderColor to 'border-color'
        },
        "a:hover": {
          "border-color": "currentColor", // corrected from borderColor to 'border-color', equivalent to hover:prose-a:border-current
        },
        pre: {
          "margin-left": "-1rem", // prose-pre:-mx-4 (adjusted for UnoCSS)
          "margin-right": "-1rem", // prose-pre:-mx-4 (adjusted for UnoCSS)
          "border-radius": "0", // prose-pre:rounded-none
          padding: "0", // prose-pre:p-0
        },
      },
    }),
  ],
});
暗色模式实现
在曾今我也是一个所有设备暗色模式常驻的用户,所以哪怕对于只是玩具的项目我支持暗色模式的意愿也依然强烈。在 Next.js 中实现暗色模式的方法有很多,最低代码的实现是直接使用 next-themes。但是使用 next-themes 给我的博客提供暗色模式的时候,评论系统 Disqus 无法正确识别暗色模式,导致评论区无法正常显示。所以不妨手动实现暗色模式,顺便熟悉 React Context 的使用。
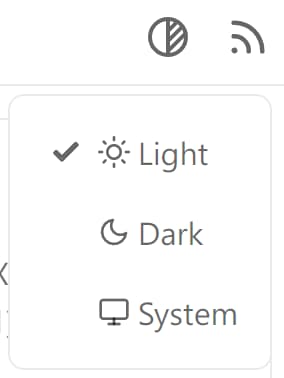
对于颜色模式有「总是亮色」、「总是暗色」以及「跟随系统」三种模式。默认为「跟随系统」,对于「总是亮色」和「总是暗色」,可以通过浏览器 localStorage 保存用户的选择。这相较于以往当用户手动切换颜色模式时保存进 localStorage、手动切换回系统同样的颜色模式时再删除 localStorage 重新跟随系统的做法基于用户更大的控制。
React Context 被在父组件中创建并填充一些数据后,其下的所有子组件都可以通过 useContext 获取到这些数据,这样我们就可以在任何地方获取到颜色模式的状态,是 React 官方实现并推崇的状态管理方式。
import { useState, useContext, createContext } from "react";

const ThemeContext = createContext();

export const useTheme = () => useContext(ThemeContext);

export const ThemeProvider = ({ children }) => {
  const [theme, setTheme] = useState();

  return (
    <ThemeContext.Provider value={{ theme, setTheme }}>
      {children}
    </ThemeContext.Provider>
  );
};
在 app 的 layout.jsx 中使用 ThemeProvider 包裹整个网站:
// app/layout.jsx
import { ThemeProvider } from "path/to/theme";

export default function Layout({ children }) {
  return (
    <html suppressHydrationWarning>
      <body >
        <ThemeProviders>
          {children}
        </ThemeProviders>
      </body>
    </html>
  );
}
完成上述准备工作后,在任何位置──包括 React Server Component 内,都可以通过引入 useTheme 获取颜色模式的 getter 和 setter:
import { useTheme } from "path/to/theme";

export default function Page({ children }) {
  const { theme, setTheme } = useTheme();

  // ...
}
倘若你也使用 Tailwind CSS,可以在顶部 className 中使用,以实现手动控制的颜色模式:
<!-- Dark mode enabled -->
<html class="dark">
<body>
  <!-- Will be black -->
  <div class="bg-white dark:bg-black">
    <!-- ... -->
  </div>
</body>
</html>
通过 useEffect 副作用监听包括 theme 在内的 States 变化,通过 window.matchMedia("(prefers-color-scheme: dark)") 监听系统颜色模式变化:
export default const ThemeProvider = ({ children }) => {
  // const ...

    const handleColorSchemeChange = useCallback(
    (event) => {
      if (!event) {
        event = window.matchMedia("(prefers-color-scheme: dark)");
      }
      if (event.matches) {
        setColorScheme("dark");
      } else {
        setColorScheme("light");
      }
    },
    [setColorScheme],
  );

  useEffect(() => {
    window
      .matchMedia("(prefers-color-scheme: dark)")
      .addEventListener("change", handleColorSchemeChange);

    return () => {
      window
        .matchMedia("(prefers-color-scheme: dark)")
        .removeEventListener("change", handleColorSchemeChange);
    };
  }, [handleColorSchemeChange]);

  useEffect(() => {
    if (theme != "system" && theme != "light" && theme != "dark") {
      console.error("color must be system, light or dark");
    } else {
      if (theme == "system") {
        typeof window !== "undefined" && localStorage.removeItem("user-color-scheme");
        if (colorScheme == "dark") {
          document.documentElement.classList.add("dark");
        } else {
          document.documentElement.classList.remove("dark");
        }
      } else if (theme == "dark") {
        typeof window !== "undefined" && localStorage.setItem("user-color-scheme", theme);
        document.documentElement.classList.add("dark");
      } else if (theme == "light") {
        typeof window !== "undefined" && localStorage.setItem("user-color-scheme", theme);
        document.documentElement.classList.remove("dark");
      }
    }
  }, [theme, colorScheme]);

  // return ...
};
即便如此仍然不完美——倘若之前在 localStorage 中保存了颜色模式,而本次重新打开网页的时候 Next.js 仍未加载完毕,便无法避免「闪一下」这种糟糕体验。参考 next-themes 的做法,在 Context Provider 插入一个纯 JavaScript 脚本,React Server Component 会将其直接写进第一次获取的 HTML 中,即便 Next.js 仍未加载完毕也能正确显示颜色模式:
export const ThemeProviders = memo(({ children }) => {
const [theme, setTheme] = useState(() => {
if (typeof window === "undefined") {
return undefined;
}
const localTheme = localStorage.getItem("user-color-scheme");
return localTheme || "system";
});
const [colorScheme, setColorScheme] = useState(() => {
if (typeof window === "undefined") {
return undefined;
}
if (window.matchMedia("(prefers-color-scheme: dark)").matches) {
return "dark";
} else {
return "light";
}
});
// ...
return (
<ThemeContext.Provider value={{ theme, setTheme }}>
<script
suppressHydrationWarning
dangerouslySetInnerHTML={{
__html:
'!function(){const e=localStorage.getItem("user-color-scheme");"dark"===e||!e&&window.window.matchMedia("(prefers-color-scheme: dark)").matches?document.documentElement.classList.add("dark"):document.documentElement.classList.remove("dark");}()',
}}
/>
);
});仅此一役,即便是对于 React 一知半解的小白 比如我 也会对于 React 的各种「钩子」有更深的理解。
优化与杂项
在 Next.js 13 以后通过 export const metadata 统一控制页面以及子页面的元数据、Next.js 14 以后通过 export const viewport 将原本在 metadata 内的 viewport 单独拎出。利用 generateMetadata 亦可在生成利用 async 函数在获取充分的页面信息后再据此生成元数据。
Next.js 内置许多优化且大部分无需手动配置,例如图片、字体乃至整个组件的懒加载以提升核心网页指标,Next.js 13 稳定下来的 App Router 以及默认使用 React Server Components 将大部分渲染工作放在服务端以减轻客户端性能压力,Routing 与 Nested Layout 配合实现无刷新导航并尽可能复用布局……
对于仅仅希望得到一个框架工具、并不指望深入理解其内部工作原理的开发者来说,到这一步已经足矣。充其量再把所有数据获取包裹在 react.cache 内、所有组件包裹在 react.memo 内、所有依赖父组件变量而在父组件中定义的子组件包裹在 useCallback 内(最后这个还真不一定,参见 PRIN 的 真的不可以在 React 组件内部嵌套定义子组件吗?)。
正如前文所述,由于不希望频繁触发更新部署,ginb 是在用户请求的时候才会获取最新数据。而为了不暴露 token,这一操作是通过 Vercel Serverless Functions 完成的,无法静态导出。这也意味着额度可能会被别有用心的人滥用。对此或许额外套一层 CDN 并单独配置防火墙规则一定程度上有效。
后
最初是由于课设 Demo 做的 Python API,想尝鲜放在 Vercel Serverless Function 上运行,顺带学了 Next.js。那次 Pre 的效果确实不错,听众除了单纯观看效果还可以自己操作尝试,这是运行在 localhost 的 Demo 无法比拟的。
而那之后,我还 使用 Next.js 对本博客 UI 进行一次完全重构。ginb 是我对于 Next.js 与 GitHub API 的又一次尝试。尽管由于各种原因我的博客恐怕是无法开源的,而 ginb 在 Next.js 部分与本博客有着大量的代码复用,在将 src 目录移植到你的项目中后,只需要更改文章数据获取并序列化即可得到与本站类似的体验,一定意义上也算是开源本博客的样式了。
考虑到「历史的惯性」太过深厚,我自己怕是不会放弃使用 Markdown 文件的形式而转向在 GitHub Issues 上写作。不过倘若你不受过往的惯例缠身,只希望找一个方便写作分享的形式,写在 GitHub Issues 着实值得考虑,毕竟还有许多大佬也确确实实正在这么实践着的。
